
Updated
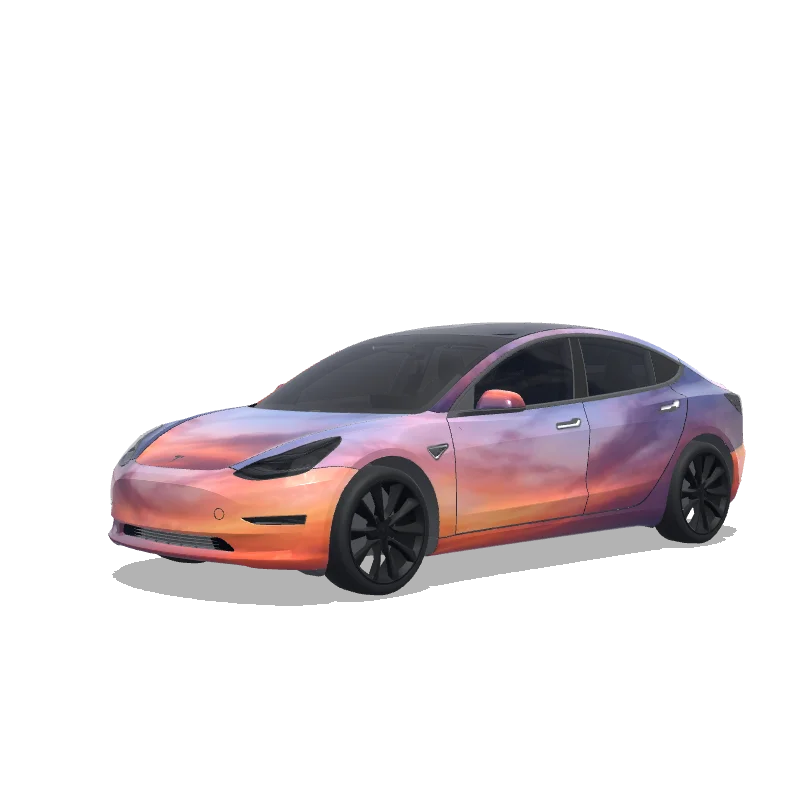
For a digital Tesla Model 3 wrap, begin with one graphic you want to recognize from across the screen. This design notebook develops three options: an offset stripe, a number badge and a framed illustration. Each gives you a palette and a practical order of edits. They are original layout exercises, not a ranking of popular downloads or recommendations for physical vinyl.
Community designs to study
Look at the actual designs below for color and placement references. The original exercises later in this article are separate design briefs.

This Standard & Premium example keeps the subject simple: the color transition is the main graphic. It is a useful reference when deciding whether to add more illustration.
Open this design in the editor →| You have… | Try… | Avoid… |
|---|---|---|
| No illustration, only colors | Offset stripe | A fragile stripe that depends on every seam aligning |
| A personal number or short initials | Number badge | Borrowed sponsor logos or mirrored lettering |
| An original drawing | Framed illustration | Stretching the subject across the whole UV sheet |
Offset stripe: put the imbalance in one deliberate place
- Body
#E6E9E8 - Stripe
#24475B - Pin accent
#E18559
Use a pale body with a broad dark stripe shifted away from the hood center. A much smaller warm accent beside it gives the design a second scale. The goal is a visible asymmetry, not a promise that one rectangle will map continuously across the entire vehicle.
- Create the hood stripe first. Rotate the preview until its direction is clear before adding a second segment elsewhere.
- Build trunk or bumper accents as separate shapes. Use the same width relationship, then adjust positions for the actual panel.
- Keep the doors mostly plain in the first draft. Add a small matching side mark only if the side view needs a connection.
Preview check: At the front three-quarter angle, the stripe should look intentionally offset. If it looks like a near-miss at the center, move it farther aside or center it fully.
Personal number badge: separate identity from sponsorship
- Body
#263D37 - Badge
#E8DFC8 - Number
#202729
Pick a number that means something to you and give it a simple high-contrast background. A rounded square or circle is enough. Keep the hood and rear quieter so the car has one visual hierarchy rather than a label on every panel.
- Place the badge within one door panel and keep it away from the handle and the panel edges in the mapped preview.
- Add the number as editable text. Save a version before adjusting the second side.
- Position the other badge independently and read its text from that side. Do not copy a mirrored image of the entire composition.
Preview check: Rotate to front, side and rear views at the ordinary camera distance. If the badge only works when zoomed in, reduce surrounding decoration before increasing detail.
Framed illustration: protect the subject from panel cuts
- Body
#C9D7DE - Frame
#3E4764 - Highlight
#EAB6BA
Use an illustration you own, with a clear silhouette and a transparent background if appropriate. Put it inside a simple color field on one door. The frame gives you a planned boundary, so a character, pet portrait or object does not need to span a difficult seam.
- Import the artwork without the editor interface, social-media captions or a screenshot border.
- Make a frame with a separate shape layer, then fit the subject inside it without distorting the drawing.
- Give the opposite door its own position and orientation. Repeat a small color from the illustration at the rear if the composition needs balance.
Preview check: Watch faces, lettering and other recognizable details while rotating. If a seam clips the subject, move or shrink the subject rather than stretching the whole template.
Choose the right Model 3 before arranging the graphics
Tesla publishes separate original Model 3, 2024+ Standard & Premium, and 2024+ Performance templates. The Highland nickname alone does not identify the correct file. These three compositions are ideas you can rebuild on the right template, not a single PNG that fits all three. Use our template comparison to choose the editor before placing a stripe or door badge.
Start with shapes when precision matters
Large rectangles, circles and plain text make placement changes easy to inspect. In the editor, add one element, move and resize it, then rotate the car to see where it lands. Add the next element only when the first one is correct. For an AI starting image, keep the same review order: body color, major shapes, readable details. A polished generation still needs a placement check.
Use a small preview as a composition check
A normal-size view reveals whether the design has one recognizable idea. Zoom in to inspect a seam, then return to the original framing to judge the overall result. If a pale border disappears, increase its contrast or thickness instead of adding a second border. If several motifs compete, keep the one you would want someone to notice first. This is an editing method, not a measured claim about a particular vehicle display.
Keep a reusable project and export the actual texture
Save the layers if you want to change the number or illustration later. Export the flat PNG, check its file size and safe filename, and transfer it using the documented app or USB route. The cover image is a credited community design and is separate from these three original briefs. Download existing artwork from the matching gallery when you want a finished file instead of a new design exercise.
Questions before you export
Will the stripe stay aligned after switching to Performance?
Do not assume so. Use the dedicated Performance layout and arrange the segments again. Matching image dimensions does not mean matching panel coordinates.
Can I create a digital satin-black or chrome look?
You can choose dark colors and painted highlights, but a PNG is color artwork. It does not install a new material or control the car screen’s reflections. Judge it as an on-screen design.
Continue with your wrap
Sources and compatibility
File requirements and template selections are checked against the sources below. Original palettes and layout exercises are design suggestions, not official Tesla designs or vehicle test results. Your vehicle’s features and software determine final compatibility.